
How to Build a Real-Time Gemini 2.0 Learning Assistant with Interactive Canvas
Gemini Development Tutorial V5


In this tutorial, we will continue building fascinating real-time chat applications using Gemini 2.0 and its multimodal Live API. Let’s build a learning assistant with real-time voice and text interaction based on a drawing canvas this time.
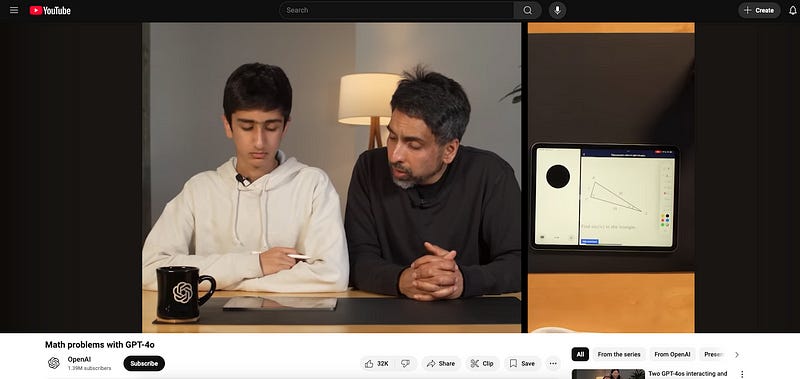
You might have seen the old video from OpenAI demonstrating how got-4o assists the student in learning math on a screen of Khan Academy by asking leading questions and providing hints to guide the student towards the correct answer.
By using our previous screen-sharing demo project, we can easily duplicate the same experience by sharing the screen of a learning website or document, operating some edit tools and letting Gemini 2.0 assist the user in learning the content.

However, for real-world applications, relying solely on screen sharing has several limitations. It is, at best, a hack to use, and in the real world, there are many reasons to avoid it, as it couples the application to the specific environment. For example, even if the web app is written in pure HTML and Javascript, it is almost impossible to reuse it to move to the mobile app. It is full of multi-thread with screen sharing, editing together, and voice talking, which needs operating across the app. So, when you want to develop a robust and commercial product, it can be rather difficult to integrate and control the user experience.
This is where the in-app document editor, specifically built around a canvas element, becomes essential. By building our own interface for image loading and editing, we gain more control and have higher scalability and flexibility for future features and uses.
System architecture
Now, let’s see the design of our project.
We will continue to use the same project structure as the previous screen-sharing demo, but we’ll introduce some key changes in how the client interacts with the server and the Gemini Multimodal Live API. The significant shift there is that we’ve replaced the screen-sharing component with an interactive canvas element where the user can load images and make some basic edits using a drawing tool. The client also includes the audio capture, playback, text transcription and the connection to the WebSocket for communication with the server.
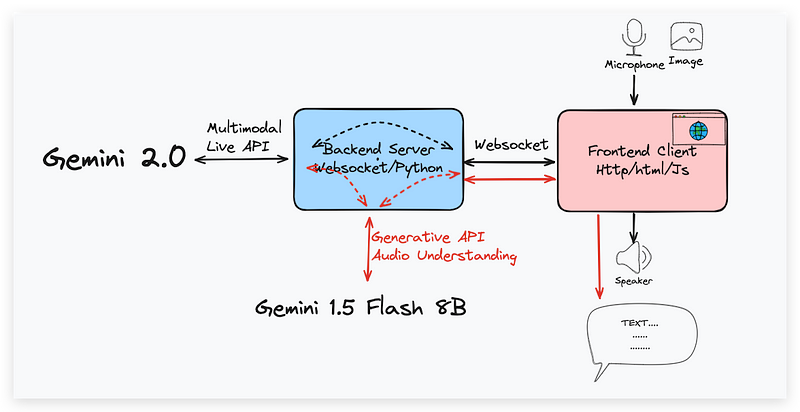
On the server side, the code remains the same as our last demo; that is, upon receiving a message, the server forwards both of those media components’ image and audio to the Live API, and the image is captured from the canvas element. It’s also responsible for receiving the streaming response from the Gemini API and forwarding it back to the client. The voice streaming will also be fed to Gemini 1.5 for transcript generation.
Now, we are going to walk through the code. Since the number of lines is a little bit big, I’ll only explain the most important parts of the code. If you want to see the full code, you can find and download it in my GitHub repo, which contains not only the project in this tutorial but also the previous ones in the Gemini 2.0 series, including screen sharing, transcription output, and camera interaction.
Code walkthrough
Now, let’s start with the server side of the code walkthrough.
Server Design
Install the dependencies, including both the two Gemini APIs, the production google-generativeai for speech-to-text generation for transcription and the experimental multimodal live API google-genai for Gemini 2.0 real-time audio and image interaction, as well as the websockets and pydub that is for audio processing.
pip install --upgrade google-genai==0.3.0 google-generativeai==0.8.3 websockets pydubTogether with it, you should make sure the FFmpeg software is installed on your machine. For the Ubuntu system, you can use the apt-get install ffmpeg to have it installed.
Moving to the code:
import asyncio
import json
import os
import websockets
from google import genai
import base64
import io
from pydub import AudioSegment
import google.generativeai as generative
import wave

# Load API key from environment
os.environ['GOOGLE_API_KEY'] = ''
generative.configure(api_key=os.environ['GOOGLE_API_KEY'])
MODEL = "gemini-2.0-flash-exp"  # use your model ID
TRANSCRIPTION_MODEL = "gemini-1.5-flash-8b"

client = genai.Client(
  http_options={
    'api_version': 'v1alpha',
  }
)
The first section configures the key from Google AI Studio access to the API through an environment variable and specifies the model that we’ll be using. Here, we use the gemini-2.0-flash-exp model for the real-time image and audio interaction and the gemini-1.5-flash-8b model for the speech-to-text transcription because it’s super fast and accurate enough for this easy task.
The core of the server-side logic is the gemini_session_handler function.
Keep reading with a 7-day free trial
Subscribe to Lab For AI to keep reading this post and get 7 days of free access to the full post archives.