
How to Create an Interactive UI for CrewAI Applications
A Quick Tutorial of CrewAI + Panel with Human Interaction

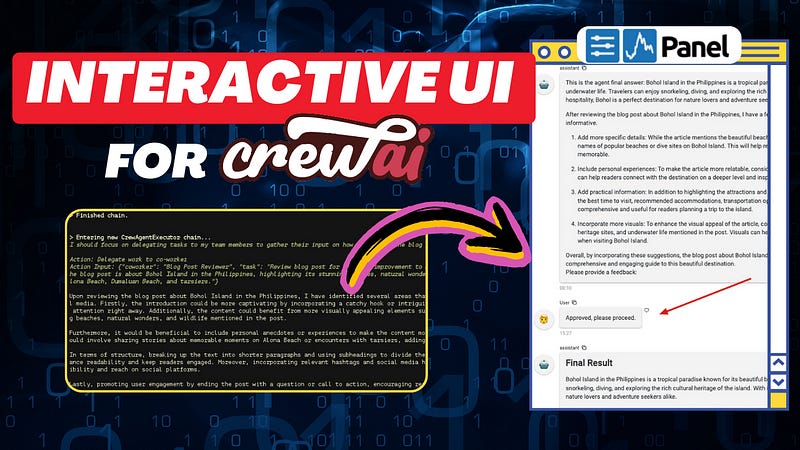
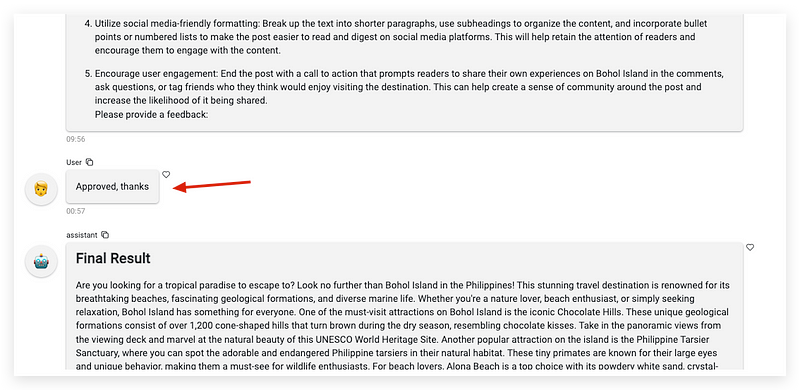
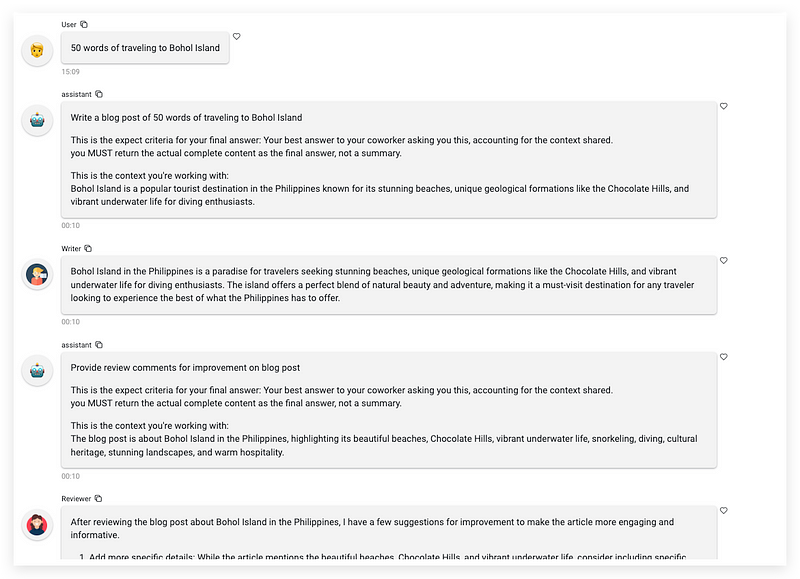
In the previous tutorial, we walked through app development with the CrewAI framework using Streamlit. However, the app we built was quite basic, which only demonstrated a CrewAI workflow visualization triggered by the initial prompt a user inputs. It lacked interaction between humans and the agent group after the workflow began. In a typical multi-agent application, human input is critical to ensure each step generated by AI agents can be reviewed and approved. Therefore, today we will create a new version of the CrewAI app that enables agents to request human input in the visualized chat box and allows humans to provide feedback through the chat input widget on the web.
Specifically, in this new UI design, I opted to move away from Streamlit as the UI builder. I’ll explain the rationale behind this decision later. Instead, I’ll be utilizing Panel, a framework I’ve previously used for AutoGen projects, to reconstruct the entire CrewAI visualization design and expand human interaction capabilities.
Why not use Streamlit
In the beginning, I attempted to extend the original CrewAI + Streamlit development to include human interaction. However, There was a fundamental limitation within Streamlit’s framework that made this approach unfeasible, because of the principle design of Streamlit.
If you look at the chatbot demo code for Streamlit, you’ll continuously find snippets similar to this at the beginning of every program:
for msg in st.session_state.messages:
    st.chat_message(msg["role"]).write(msg["content"])
This loop is responsible for recursively displaying all historical chat messages. As a Python-based web framework, Streamlit operates on a “refresh” concept. This means every interaction with Streamlit widgets, such as message input or menu selection, triggers an internal refresh that reruns the application from the first line. Consequently, any interim data must be stored in a cache object session_state to ensure its existence upon reset.
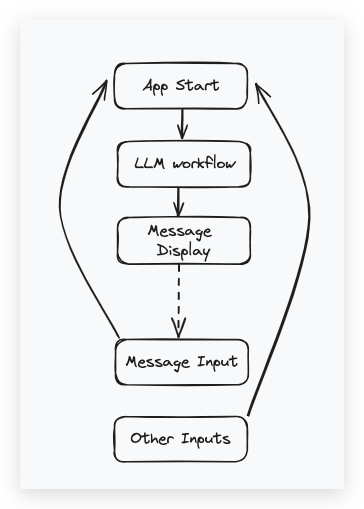
This approach works fine for simple LLM-powered chatbot applications. We can append user input to the chat history and prompt the language model for inference, regardless of app resets. However, it becomes impractical for complex LLM-powered applications like CrewAI structured multi-agent apps.
The collaborative nature of the internal thought-decision-action process within a multi-agent workflow doesn’t align well with the store-restore paradigm especially when human interaction is involved. In CrewAI, when an agent requests human input, it halts the entire workflow and utilizes the standard input function input() to await user input on the terminal. If we were to replace the standard input with Streamlit’s chat input widget in our design, any user input would trigger a workflow restart, causing the generated thoughts and actions to vanish.
Therefore, we need a more suitable framework capable of maintaining the runtime session of both the app and web interface across multiple rounds of input and output.
Now, let’s move our focus to Panel and explore how it achieves UI design with seamless human-agent interaction within our CrewAI application.
CrewAI + Panel
How Panel Works
Before we dive into the code of the entire CrewAI process, let’s quickly explore the Panel framework.
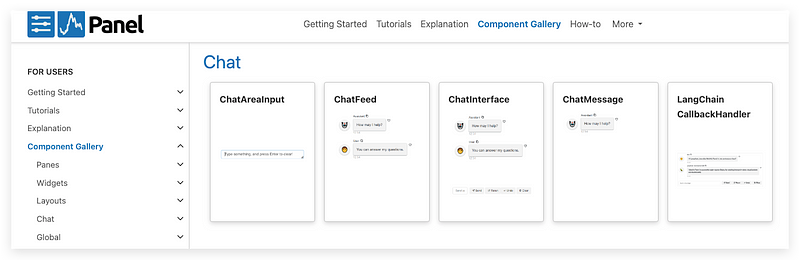
As a web development framework, Panel provides a series of powerful but easy-to-use widgets to help data app developers quickly visualize their thoughts, experiments, or final projects without any HTML knowledge background. To meet the explosive requirement of the LLM apps, they expanded their widgets library with chatbot templates called ChatInterface, which will be used in this CrewAI demo project.
Unlike Streamlit, Panel works as a “server” in the background without actively resetting the app, so we can put the function logic sequentially in the main body or callbacks like a normal Python program.
To start a simple Panel server, firstly, import the package:
import panel as pn Select a style of overall UI appearance.
pn.extension(design="material")Start the server with ChatInterface widgets.
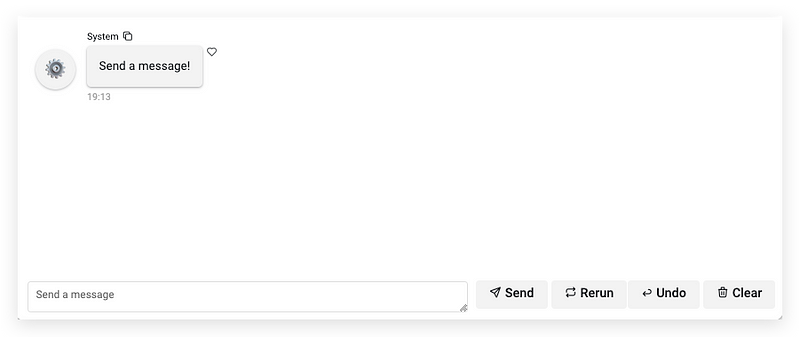
chat_interface = pn.chat.ChatInterface(callback=callback)
chat_interface.send("Send a message!", user="System", respond=False)
chat_interface.servable()
The main function of our CrewAI will be implemented in the callback that will be introduced later. To add messages in the chat area, just use the .send() method. After the program runs by the command in the terminal:
panel serve app.pyyou will find the below output on your terminal indicating the successful app running.
2024–04–21 19:12:46,169 Starting Bokeh server version 3.4.0 (running on Tornado 6.4)
2024–04–21 19:12:46,171 User authentication hooks NOT provided (default user enabled)
2024–04–21 19:12:46,176 Bokeh app running at: http://localhost:5006/crewai_panel
2024–04–21 19:12:46,176 Starting Bokeh server with process id: 5308
CrewAI UI Development
Knowing how to create a Panel app, let’s see how to integrate CrewAI workflow into it.
Keep reading with a 7-day free trial
Subscribe to Lab For AI to keep reading this post and get 7 days of free access to the full post archives.