How to Create a Web UI for AutoGen
A Quick Tutorial to Implementation of AutoGen UI by Panel
AutoGen is a development framework from Microsoft that helps create applications with automated multi-agent conversations. It works by letting multiple assistant-type agents talk to one another following the role definitions to complete complex jobs. These agents can be tailored to your needs, are easy to chat with, and let humans interactively join in the conversation smoothly.
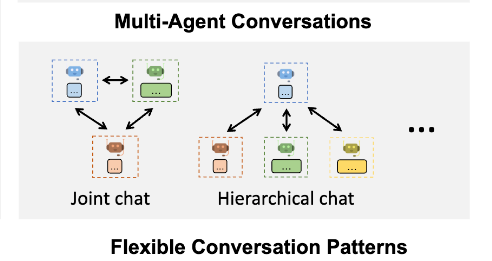
Two main advantages make AutoGen stand out. First, it allows users to leverage various and useful conversation patterns that cover many practical fundamental usage scenarios, like group chat, joint chat, and hierarchical chat.
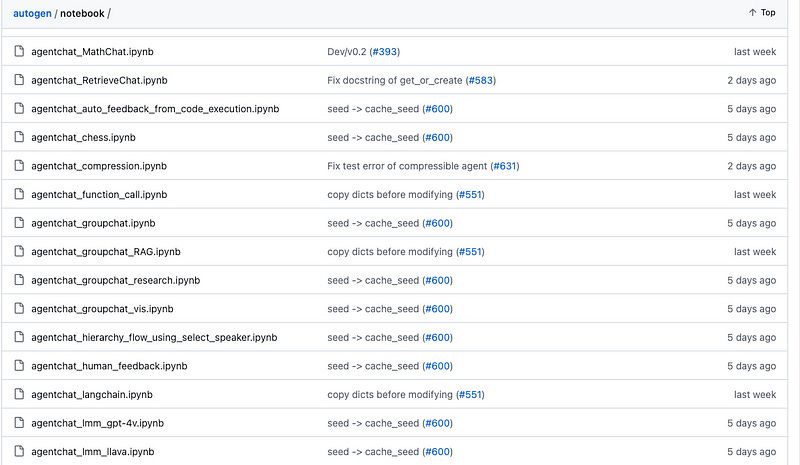
Based on these patterns, there are a lot of program templates provided in AutoGen’s repository we can freely modify and deploy in our projects.
The second advantage is that AutoGen is integrated with other prompting frameworks like LangChain or techniques like RAG, and function call..to enhance the LLM-based agents’ capabilities with additional knowledge sources.
I am not going deeper into the details of AutoGen itself, you could check my previous article for a background understanding of AutoGen’s usage.
Setting Up a Fully AI-Powered Studio with AutoGen
AutoGen’s output is quite rich in context with all the generated conversations made by different agents, but unfortunately, is hard to read especially the code snippets, tables, and other mark-down formatted content.
Therefore, in this short tutorial, I would like to introduce how to use Panel, an open-source web framework focusing on data visualization, to equip AutoGen with a decent and chatbot-style UI.
Panel with Chat Components
Panel is a versatile Python library for creating interactive dashboards and web applications directly from your data analysis. It easily integrates with the various machine learning ecosystems like Bokeh and supports a wide range of visualizations and widgets. Previously Panel was dedicated to data scientists and analysts, by facilitating the development of interactive, data-driven UIs without requiring extensive web development skills.
Remarkably, along with Streamlit and other lightweight visualization competitors, Panel 1.3 started providing Chatbot components for LLM-based development.
Similar to other LLM web frameworks, Panel also provides integration with LangChain and other open-source language models along with powerful interactive widgets for streamlining human-AI conversation development.
Well, these are still a little harder to persuade experienced developers to switch from mature chatbot frameworks to Panel ChatInterface. The most powerful feature for me is the feature of chained responses with multiple roles, as it can perfectly fit AutoGen’s multi-agent conversational characteristics.
Look at what the Panel Chained Response looks like:
Unlike other chatbot frameworks, which contain only 3 roles: System, User, and Assistant, to align with the popular prompting structure of large language models, Panel’s chained response messaging can handle free roles with custom names and avatars in one conversation interface. So this project will be easily completed when we re-direct the output from each AutoGen agent to the relevant message widgets in the Panel.
Without further ado, let’s code it.
Code Walkthrough
Before we start programming this demo, let’s have a quick walkthrough of Panel’s new ChatInterface library.
Panel Chatbot
To create the simplest Panel chatbot without generative capabilities, we only have to do very few steps.
First, install or upgrade the Panel packages to the latest version (>1.3).
pip install --upgrade panelImport and define the style of widgets to “materials”.
import panel as pn

pn.extension(design="material")
Create a chat_interface that initials the Panel’s chat components implicitly.
chat_interface = pn.chat.ChatInterface(callback=callback)
chat_interface.send(
    "Enter a message in the TextInput below and receive an echo!",
    user="System",
    respond=False,
)
chat_interface.servable()
The enabler of the chatbot is to add a callback to handle the user’s input, any return of a message string or structured object will be automatically displayed on the conversation interface.
Return message string:
def callback(contents: str, user: str, instance: pn.chat.ChatInterface):
    message = f"Echoing {user}: {contents}"
    return message
Then, type the panel command to run the web server.
panel serve source_code.pyWhen you receive something like below, that means the panel server is successfully running on the localhost with default port 5006.
2023–11–13 18:26:25,462 Starting Bokeh server version 3.3.0 (running on Tornado 6.3.3)
2023–11–13 18:26:25,464 User authentication hooks NOT provided (default user enabled)
2023–11–13 18:26:25,470 Bokeh app running at: http://localhost:5006/source_code
2023–11–13 18:26:25,470 Starting Bokeh server with process id: 24342
2023–11–13 18:26:31,085 WebSocket connection opened
2023–11–13 18:26:31,085 ServerConnection created
Visit the URL on your web browser:
If you would like to custom the name and avatar of more bots, you can return a dict object by providing this info:
def callback(contents: str, user: str, instance: pn.chat.ChatInterface):
    sleep(1)
    if user == "User":
        yield {
            "user": ARM_BOT,
            "avatar": "🦾",
            "object": f"Hey, {LEG_BOT}! Did you hear the user?",
        }
        instance.respond()
    elif user == ARM_BOT:
        user_message = instance.objects[-2]
        user_contents = user_message.object
        yield {
            "user": LEG_BOT,
            "avatar": "🦿",
            "object": f'Yeah! They said "{user_contents}".',
        }
AutoGen Integration
Now we are going to integrate AutoGen messaging into the Panel framework to demonstrate a multi-agent conversation UI. Firstly, install the AutoGen package.
pip install --upgrade pyautogenFor easy implementation, I will use an existing project from AutoGen’s repo called “Groupchat Research” which performs research processing with multi-agent group chat. Let’s configure the LLM as the latest GPT-4 Turbo model for auto-generation.
import autogen
import panel as pn
import openai
import os
import time

config_list = [
    {
        'model': 'gpt-4-1106-preview',
        'api_key': 'sk-Your_OpenAI_Key',
    }
    ]
gpt4_config = {"config_list": config_list, "temperature":0, "seed": 53}
Then copy and modify the source code from the repo of the Groupchat Research project to define the roles of the chat participants — Admin, Engineer, Scientist, Planner, Executor, and Critic. You should replace the “…” with their actual system prompts from the source code in GitHub. There are a few modifications I’ve made for the Admin role in order to make it more autonomous. For example, it will end the conversation by receiving TERMINATE, and be equipped with GPT-4 Turbo to automate approval of other agents’ requests.
user_proxy = autogen.UserProxyAgent(
   name="Admin",
   is_termination_msg=lambda x: x.get("content", "").rstrip().endswith("TERMINATE"),
   system_message="""A human admin. Interact with the planner to discuss the plan. Plan execution needs to be approved by this admin.
   Only say APPROVED in most cases, and say EXIT when nothing is to be done further. Do not say others.""",
   code_execution_config=False,
   default_auto_reply="Approved",
   human_input_mode="NEVER",
   llm_config=gpt4_config,
)
engineer = autogen.AssistantAgent(
    name="Engineer",
    llm_config=gpt4_config,
    system_message='''...''',
)
scientist = autogen.AssistantAgent(
    name="Scientist",
    llm_config=gpt4_config,
    system_message="""..."""
)
planner = autogen.AssistantAgent(
    name="Planner",
    system_message='''...
''',
    llm_config=gpt4_config,
)
executor = autogen.UserProxyAgent(
    name="Executor",
    system_message="...",
    human_input_mode="NEVER",
    code_execution_config={"last_n_messages": 3, "work_dir": "paper"},
)
critic = autogen.AssistantAgent(
    name="Critic",
    system_message="...",
    llm_config=gpt4_config,
)
After all these roles are created, we can consolidate them into a manager.
groupchat = autogen.GroupChat(agents=[user_proxy, engineer, scientist, planner, executor, critic], messages=[], max_round=20)
manager = autogen.GroupChatManager(groupchat=groupchat, llm_config=gpt4_config)
Now, we should initial the Panel’s chat interface with the callback function. In the callback function, the query message will trigger the entire chat of AutoGen.
pn.extension(design="material")

def callback(contents: str, user: str, instance: pn.chat.ChatInterface):
    user_proxy.initiate_chat(manager, message=contents)

chat_interface = pn.chat.ChatInterface(callback=callback)
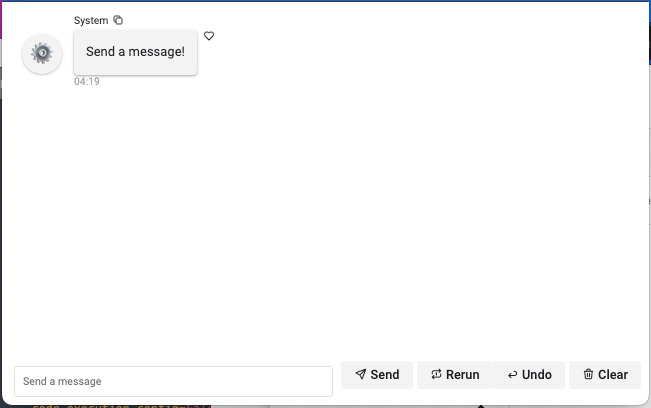
chat_interface.send("Send a message!", user="System", respond=False)
chat_interface.servable()
Once the user types the query into the input box on the Panel UI, the Admin role will send it to chat_manager, the chat_manager will select the most suitable role to handle, which is the design idea of AutoGen.
To facilitate the messages in the Panel UI, we should add another two steps:
Insert print function
print_messages()to each agent asreply_funcfor printing out the message it receives in real-time.
user_proxy.register_reply(
    [autogen.Agent, None],
    reply_func=print_messages,
    config={"callback": None},
)

engineer.register_reply(
    [autogen.Agent, None],
    reply_func=print_messages,
    config={"callback": None},
)
scientist.register_reply(
    [autogen.Agent, None],
    reply_func=print_messages,
    config={"callback": None},
)
planner.register_reply(
    [autogen.Agent, None],
    reply_func=print_messages,
    config={"callback": None},
)

executor.register_reply(
    [autogen.Agent, None],
    reply_func=print_messages,
    config={"callback": None},
)
critic.register_reply(
    [autogen.Agent, None],
    reply_func=print_messages,
    config={"callback": None},
)
2. Define the print_messages() to execute the print of messages with the proper agent’s name and avatar.
avatar = {user_proxy.name:"👨💼", engineer.name:"👩💻", scientist.name:"👩🔬", planner.name:"🗓", executor.name:"🛠", critic.name:'📝'}
def print_messages(recipient, messages, sender, config):
chat_interface.send(messages[-1]['content'], user=messages[-1]['name'], avatar=avatar[messages[-1]['name']], respond=False)
print(f"Messages from: {sender.name} sent to: {recipient.name} | num messages: {len(messages)} | message: {messages[-1]}")
return False, None # required to ensure the agent communication flow continuesThat’s it.
Now we can run the server by the Panel command.
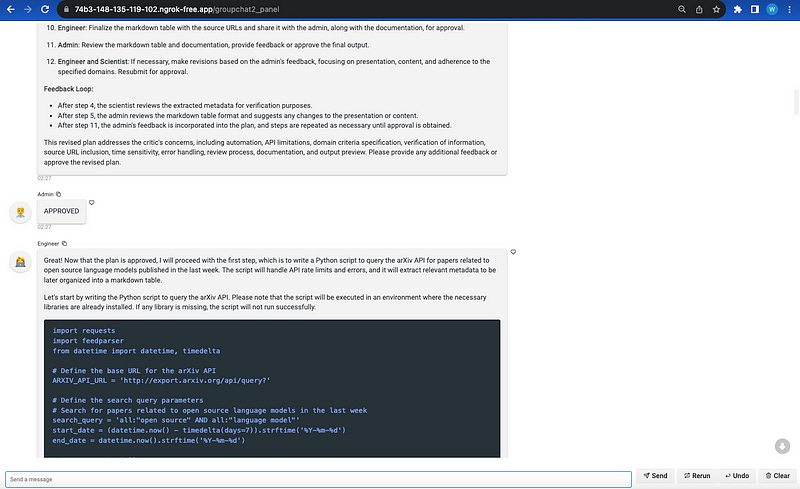
panel serve groupchat_research.pyTry to send a message to prompt the chat.
We can try the query
Find papers on open source language models from Arxiv in the last week, and create a markdown table of different domains.
If your program runs successfully like mine, the output from AutoGen is much more readable than before, with code snippets, tables, and a clear sequence of the entire chat.
Walkthrough via GIF…


