


Best Groq Practice: Making a Voice Assistant with Human Speed
A Quick Tutorial for Building a Voice Assistant Powered by Groq


As an LLM enthusiast, You must hear about Groq, and be surprised by its super fast inference experience with some open source language models. Haven’t known yet? Okay, try this demo first.
Groq
Groq is not a model, it is a new LLM inference engine powered by LPU (Language Processing Unit), a computational system other than normal GPU/CPU which is dedicated to LLM processing. From its online playground, its processing speed can reach as high as 742.47T/s for running the Gemma-7B model!

Its leading performance significantly improves the speed and responsiveness of LLM app interactions. For me, the most compelling demonstration of this speed advantage is within the realm of voice assistant apps. Groq’s speed advantage provides an incredibly smooth and intuitive user experience, where wait time is never a thing, and every interaction feels as immediate and effortless as talking to a friend.
Development on Groq
Implementing Chatbot with Groq’s LPU Inference Engine begins with accessing the API in the GroqCloud platform.
At the time of writing this article, the use of the API remained free of charge and subject to a rate limit that guarantees stable service operation.

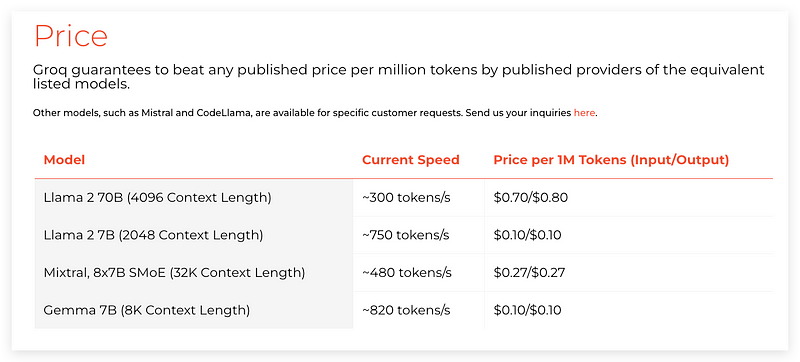
Since the price of API usage has been recently released on its document page, I guess Groq will soon charge developers for inference, although the prices for a million tokens are quite the lowest among the online inference market. So far, Groq supports three foundation models: Meta’s Llama2–70B and 7B, Mistral’s Mixtral 8x7B, and Google’s Gemma-7B-it.
For the code implementation, if you are familiar with the format of OpenAI API, it must be smooth to switch your existing projects to Groq inference API.
Install the Groq packages and then change three items from your OpenAI project.
Replace
OpenAI()withGroq()Replace the OpenAI API key with the Groq API Key
Replace the OpenAI model name with the model name from Groq, e.g.
mixtral-8x7b-32768.
!pip install grokimport os
from groq import Groq
client = Groq(
api_key=os.environ.get("GROQ_API_KEY"),
)
chat_completion = client.chat.completions.create(
messages=[
{
"role": "user",
"content": "Explain the importance of low latency LLMs",
}
],
model="mixtral-8x7b-32768",
)
print(chat_completion.choices[0].message.content)The API Key should be created in your Groq account.
Voice Assistant
Knowing how to develop a chatbot by using Groq API, let’s walk through a demo of a voice assistant with a decent UI and smooth voice conversation experience.
The voice assistant has a basic HTML structure utilizing Bootstrap for styling, and JavaScript to manage functionality like speech processing. On the backend, we have a Python-based Flask program, ready to work with Groq’s inference API. Although there are multiple programming languages involved in this demo project, don’t worry, the libraries we used are mature enough to simplify the app code as much as possible and I will explain in detail, from setting up endpoints to processing user inputs and generating voice output, ensuring clear and efficient interaction between the chatbot assistant and the user.
Block Diagram
Here is the block diagram for the overall architecture. It shows how the system fits into the user experience. When the user clicks the Start button, they speak, voice recognizes, Groq processes, the AI responds, and the speech is synthesized back into an audible answer, and loops the workflow for continuous voice input until the button is clicked again.

Code Walkthrough — HTML
Now, let’s walk through the code step by step.
We’re starting in the main HTML body where the simple chat container lives. Notice that we use Bootstrap classes for a clean, responsive UI design, and of course, you can select another styling library for a more attractive design. The key elements here are the talk button, the user text bubble, and the AI response bubble.
<!DOCTYPE html>
<html lang="en">
<head>
<meta charset="UTF-8">
<title>Voice Chatbot</title>
<link rel="stylesheet" href="https://stackpath.bootstrapcdn.com/bootstrap/4.5.2/css/bootstrap.min.css">
<style>
#chatContainer {
max-width: 600px;
margin: 30px auto;
border: 1px solid #dee2e6;
border-radius: .25rem;
display: flex;
flex-direction: column;
/*height: 500px; /* Adjust the height as necessary */
}
#startButtonContainer {
padding: 10px;
border-bottom: 1px solid #dee2e6;
}
#echoText {
flex-grow: 1;
overflow-y: auto;
padding: 15px;
}
.chat-entry {
margin-bottom: 10px;
padding: 10px;
border-radius: 10px;
}
.user-text {
background-color: #d1ecf1;
color: #0c5460;
}
.ai-text {
background-color: #e2e3e5;
color: #383d41;
}
.talk-btn {
width: 100%;
padding: .375rem .75rem;
}
</style>
</head>
<body>
<div id="chatContainer" class="shadow p-3 mb-5 bg-white rounded">
<div id="startButtonContainer">
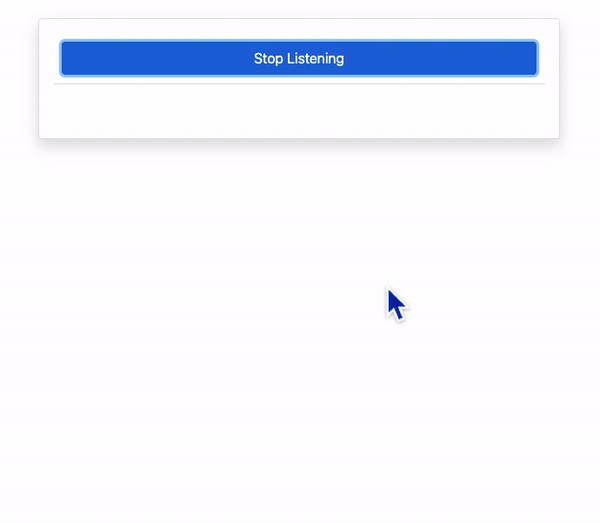
<button id="startButton" class="btn btn-primary talk-btn">🎙️ Start Listening</button>
</div>
<div id="echoText" class="mb-3"></div>
</div>
<script>
...JavaScript code will be introduced independently...
</script>
</body>
</html>Code Walkthrough — Javascript
The JavaScript section is the communication hub, with event listeners managing user actions to start and stop voice recognition.
Part 1— Voice Recognition
Keep reading with a 7-day free trial
Subscribe to Lab For AI to keep reading this post and get 7 days of free access to the full post archives.